Putty Generate Ssh Key For Linux
Go to Windows Start menu → All Programs → PuTTY → PuTTYgen. Creating a new key pair for authentication. To create a new key pair, select the type of key to generate from the bottom of the screen (using SSH-2 RSA with 2048 bit key size is good for most people; another good well-known alternative is ECDSA). Please Note:When you paste the key, it needs to be all on one line, with no extra spaces or line returns. Go back to the PuTTY session and run the following commands in order. Mkdir /.ssh chmod 700 /.ssh nano /.ssh/authorizedkeys2. This will bring up a text editor, simply right click in the putty window to paste the key you copied earlier. How To Configure SSH Keys Authentication With PuTTY And Linux Server In 5 Quick Steps 1. Get the zip file with all PuTTY binaries. Generate a private and public key pair. Open PuTTYgen.exe, press Generate button, move mouse. Configure your Linux server (create user, save public key) For this. How to Generate SSH Keys on PuTTY. SSH keys are one of the most secure SSH authentication options. It is definitely more secure than the usual SSH password authentication. Therefore, it is highly recommended to use SSH Key authentication method for connections to your servers.
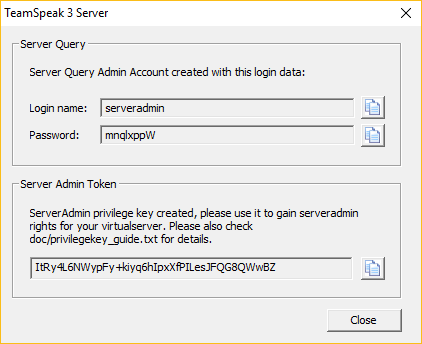 Aug 18, 2012 Hi guys, I have the following problem: I recently reinstalled my OS as I got a new HD for my computer. However I forgot to save my Teamspeak user profile. Now I don't have admin rights on my server. My question is how to create a new token to verify my user account. Or can I just add my user id to the admin group somehow? I'm running a TS3 server on a Linux machine and have normal SSH.
To create and use SSH keys on Windows, you need to download and install both PuTTY, the utility used to connect to remote servers through SSH, and PuTTYgen, a utility used to create SSH keys. On the PuTTY website, download the.msi file in the Package files section at the top of the page, under MSI (‘Windows Installer’). May 05, 2019 Creating SSH keys with PuTTYgen # To generate an SSH key pair on Windows using PuTTYgen perform the following steps: Start the PuTTYgen tool, by double-clicking on its.exe file or going to the Windows Start menu → PuTTY (64-bit) → PuTTYgen. For “Type of key to generate”.
Creating a new key pair for authenticationTo create a new key pair, select the type of key to generate from the bottom of the screen (using SSH-2 RSA with 2048 bit key size is good for most people; another good well-known alternative is ECDSA).Then click Generate, and start moving the mouse within the Window. For detailed installation instructions, see. Contents PuTTYgen download and installPuTTYgen is normally installed as part of the normal PuTTY.msipackage installation. Running PuTTYgenGo to Windows Start menu → All Programs → PuTTY→ PuTTYgen. Generate ssh key windows 7 command line. There is no need for a separate PuTTYgen download.
3min Read
SSH keys are one of the most secure SSH authentication options. It is definitely more secure than the usual SSH password authentication. Therefore, it is highly recommended to use SSH Key authentication method for connections to your servers.
With password authentication, you can connect to your server from any location, you only need to fill in your password. However, if your password gets leaked, it is a major risk as anyone who knows your password will be able to get into the server.
SSH Key authentication only allows connections from clients whose key matches the one on the server. Basically, you generate a key pair (private key and public key). The private key is placed on your local machine and the public key is uploaded to the server. When connecting to the server, a validation of these two keys is made and if the key pair passes the validation you are allowed to connect. Of course, you can upload keys of multiple users so that you or other authorized users would be able to connect to the server from different computers.
As you can see this is a much safer connection method. In this tutorial, we will focus on Windows users who use PuTTY for connections to the server and show how to generate PuTTYSSH Keys. If you want to generate SSH Keys on Linux or Mac, see this tutorial.
What you’ll need
Before you begin this guide you’ll need the following:
- Access to your Linux server / VPS
- PuTTY and PuTTYgen installed on your computer (Download here)
Step 1 — Downloading PuTTYgen
Most of you have PuTTY installed on your computers already, however, to generate SSH Keys you also will need PuTTYgen.
- Download PuTTYgenhere
- You should be able to see this file downloaded:
No installation is required for PuTTYgen, it will run when you execute the file.
Step 2 — Generating your SSH Key pair
- Open up PuTTYgen by double clicking on the puttygen.exe file you have downloaded in Step 1.
- You should be able to see a window like this:
- Before generating your SSH Key pair, you can edit some settings, for example, key length, however, in most cases the default options will work just fine.
- Generate your SSH Key pair by clicking the Generate button.
- When the progress bar starts loading, move your mouse randomly across the area to load up the bar and generate your key pair.
- Your public SSH key will be displayed on the screen:
- For additional security it is highly recommended to think of a passphrase for your SSH key (However, you can also leave it empty):
- Save your private key to any desired location on your computer and name it anything you like.
- Save your public key to the same location on your computer and name it anything you like.
And that is it, you have generated your SSH Key pair. The private key will stay on your computer (do not provide it to anyone) while your public key needs to be uploaded to the server you wish to connect to.
Step 3 — Setting up your private key on PuTTY
In order for the server to recognize your computer when connecting from PuTTY, you need to attach the private key to PuTTY.
- Open up PuTTY.
- Navigate to Connection -> SSH -> Auth in the left sidebar.
- Browse for your private key file in the field Private key for authentication
- Select the private key file with .ppk ending and click Open.
Putty Generate Ssh Key For Linux
Step 4 – Adding public key to server
Lastly, you need to upload your public key to the server:
- On your local computer, open public key file (id_rsa.pub) you generated in Step 2 with any text editor and copy its contents (public key).
- Connect to your VPS using Putty. See this guide for detailed steps.
- If .ssh folder does not exist, create it together with authorized_keys file with the following command:
mkdir ~/.ssh touch ~/.ssh/authorized_keys - Secure SSH Key file by changing permissions:
chmod 0700 ~/.ssh; chmod 0644 ~/.ssh/authorized_keys - Open authorized_keys file with vim text editor:
vim ~/.ssh/authorized_keys - Press i key on your keyboard and right mouse button to paste the public key.
- Press Esc button and type in
:x, hit Enter button. This command will save changes made to the file.
That is it, you can now use SSH keys instead of SSH password authentication to connect to your VPS.
Conclusion
You have learned how to generate PuTTY SSH Keys using PuTTYgen. This will make your connection to the server a lot more secure and convenient as you will not need to fill in the password each time. We recommend using this way of SSH authentication at all times and disable password authentication for good to completely secure your server. To find out how to completely disable SSH Password authentication on your server and use SSH Key authentication instead, follow this tutorial: How to disable SSH Password authentication on VPS.
The PuTTYgen program is part of PuTTY, an open source networking client for the Windows platform.
Putty Generate Ssh Key Linux
- Download and install PuTTY or PuTTYgen.
To download PuTTY or PuTTYgen, go to http://www.putty.org/ and click the You can download PuTTY here link.
- Run the PuTTYgen program.
- Set the Type of key to generate option to SSH-2 RSA.
- In the Number of bits in a generated key box, enter 2048.
- Click Generate to generate a public/private key pair.
As the key is being generated, move the mouse around the blank area as directed.
- (Optional) Enter a passphrase for the private key in the Key passphrase box and reenter it in the Confirm passphrase box.
Note:
While a passphrase is not required, you should specify one as a security measure to protect the private key from unauthorized use. When you specify a passphrase, a user must enter the passphrase every time the private key is used.
- Click Save private key to save the private key to a file. To adhere to file-naming conventions, you should give the private key file an extension of
.ppk(PuTTY private key).Note:
The.ppkfile extension indicates that the private key is in PuTTY's proprietary format. You must use a key of this format when using PuTTY as your SSH client. It cannot be used with other SSH client tools. Refer to the PuTTY documentation to convert a private key in this format to a different format. - Select all of the characters in the Public key for pasting into OpenSSH authorized_keys file box.
Make sure you select all the characters, not just the ones you can see in the narrow window. If a scroll bar is next to the characters, you aren't seeing all the characters.
- Right-click somewhere in the selected text and select Copy from the menu.
- Open a text editor and paste the characters, just as you copied them. Start at the first character in the text editor, and do not insert any line breaks.
- Save the text file in the same folder where you saved the private key, using the
.pubextension to indicate that the file contains a public key. - If you or others are going to use an SSH client that requires the OpenSSH format for private keys (such as the
sshutility on Linux), export the private key:- On the Conversions menu, choose Export OpenSSH key.
- Save the private key in OpenSSH format in the same folder where you saved the private key in
.ppkformat, using an extension such as.opensshto indicate the file's content.